The Great Pumpkin Bundt Cake Recipe
Introduction
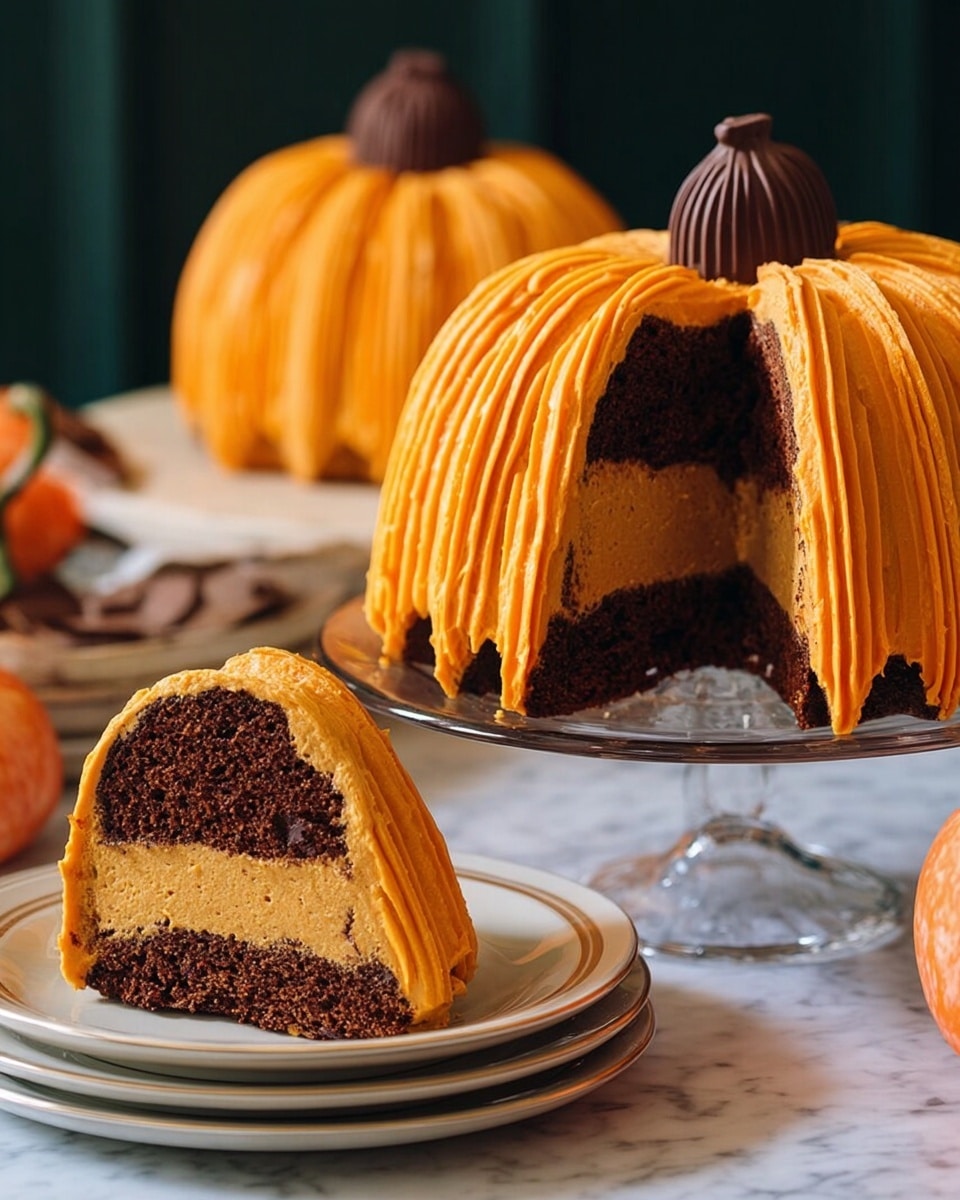
This Great Pumpkin Bundt Cake is a festive and flavorful fall dessert that’s as fun to make as it is to eat. With warm spices, rich pumpkin flavor, and creamy orange-tinted frosting, it’s perfect for holiday gatherings or cozy afternoons.
Ingredients
- 1 1/3 cups (150g) King Arthur Golden Wheat Flour
- 1 tablespoon King Arthur Pumpkin Pie Spice*
- 1 teaspoon baking powder
- 3/4 teaspoon table salt
- 1/4 teaspoon baking soda
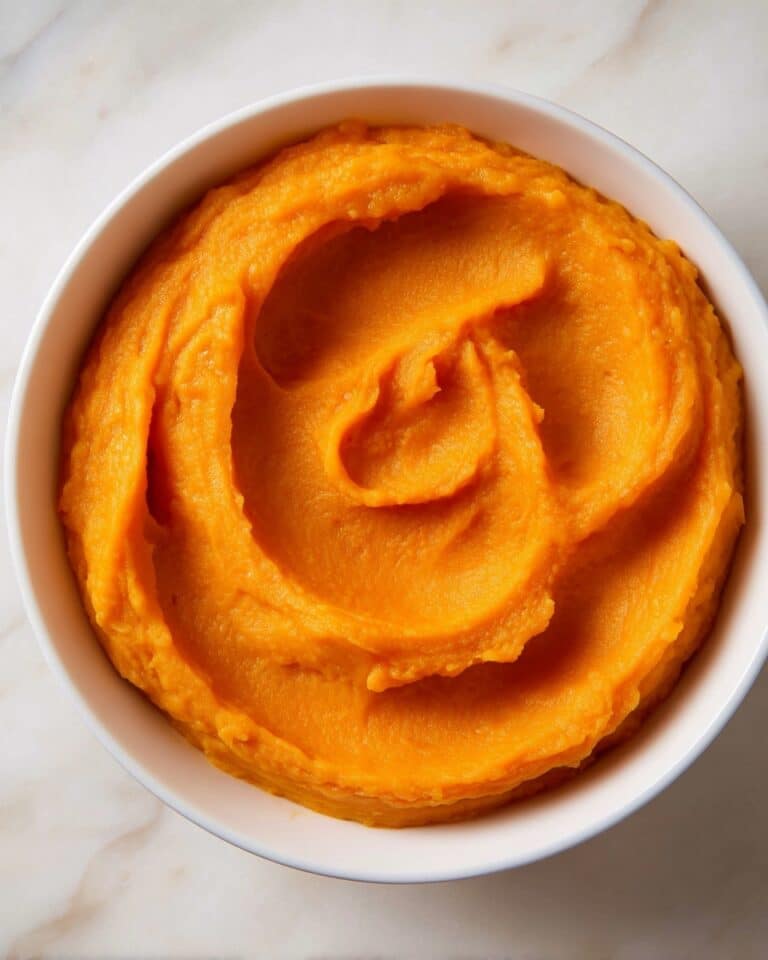
- 1 1/4 cups (284g) pumpkin purée
- 1 cup (213g) light brown sugar or dark brown sugar, packed
- 1/2 cup (99g) vegetable oil
- 2 large eggs
- 2 teaspoons King Arthur Pure Vanilla Extract
- 10 tablespoons (141g) butter, room temperature
- 1/8 teaspoon table salt
- 5 cups (565g) confectioners’ sugar, sifted if lumpy; divided
- 1 tablespoon (14g) vanilla bean paste or King Arthur Pure Vanilla Extract
- 1/4 cup (57g) milk, at room temperature; divided
- 1 packet natural orange food coloring
- 2 teaspoons water
- 1/4 cup (43g) semisweet chocolate wafers or semisweet chocolate chips
- 1 flat-bottomed cake cone
Instructions
- Step 1: Preheat the oven to 350°F. Lightly grease two mini Bundt pans (6″ pans with a 2-cup bakeable capacity is best).
- Step 2: In a small bowl, whisk together the flour, pumpkin pie spice, baking powder, salt, and baking soda. Set aside.
- Step 3: In a medium bowl, combine pumpkin purée, brown sugar, vegetable oil, eggs, and vanilla extract. Whisk until smooth with no lumps.
- Step 4: Add the dry mixture to the wet ingredients and gently whisk until fully combined.
- Step 5: Divide the batter evenly between the prepared pans (about 1 1/2 cups or 440g per pan). Smooth the tops with a small offset spatula.
- Step 6: Bake for 28 to 32 minutes, or until the cake springs back when pressed and a toothpick comes out clean.
- Step 7: Let the cakes cool in the pans for 10 minutes, then turn them out onto a rack and cool completely, about 1 hour. Prepare frosting and stem while cooling.
- Step 8: For the frosting, beat butter and salt in a stand mixer or with a hand mixer until smooth (2-3 minutes). Scrape down the bowl as needed.
- Step 9: Add half the confectioners’ sugar slowly while mixing on low speed until blended.
- Step 10: Add vanilla and 2 tablespoons milk, beat until fluffy.
- Step 11: Add the remaining confectioners’ sugar and milk gradually, then beat on medium until smooth and creamy.
- Step 12: In a small microwave-safe bowl, mix the orange food coloring with water. Microwave in 2-second intervals until smooth and the color dissolves.
- Step 13: Add 1 teaspoon of the colored mixture to the frosting, beat on high until light and fluffy. Add more color 1/4 teaspoon at a time until desired hue is reached.
- Step 14: To make the stem, melt chocolate in the microwave at 50% power in 20-second bursts or over a double boiler until smooth.
- Step 15: Trim about 3/4″ from the top rim of the cake cone. Spread melted chocolate over the cone and place upright on parchment or a plate. Refrigerate until set, 15-20 minutes.
- Step 16: Trim the domed bottoms off the cooled cakes so they sit flat when stacked.
- Step 17: Place one cake, trimmed side up, on a serving plate. Spread 1/2 cup frosting evenly on top. Place the second cake, trimmed side down, on top to form a pumpkin shape.
- Step 18: Apply a thin crumb coat layer of frosting over the entire cake and refrigerate for 15 minutes to set.
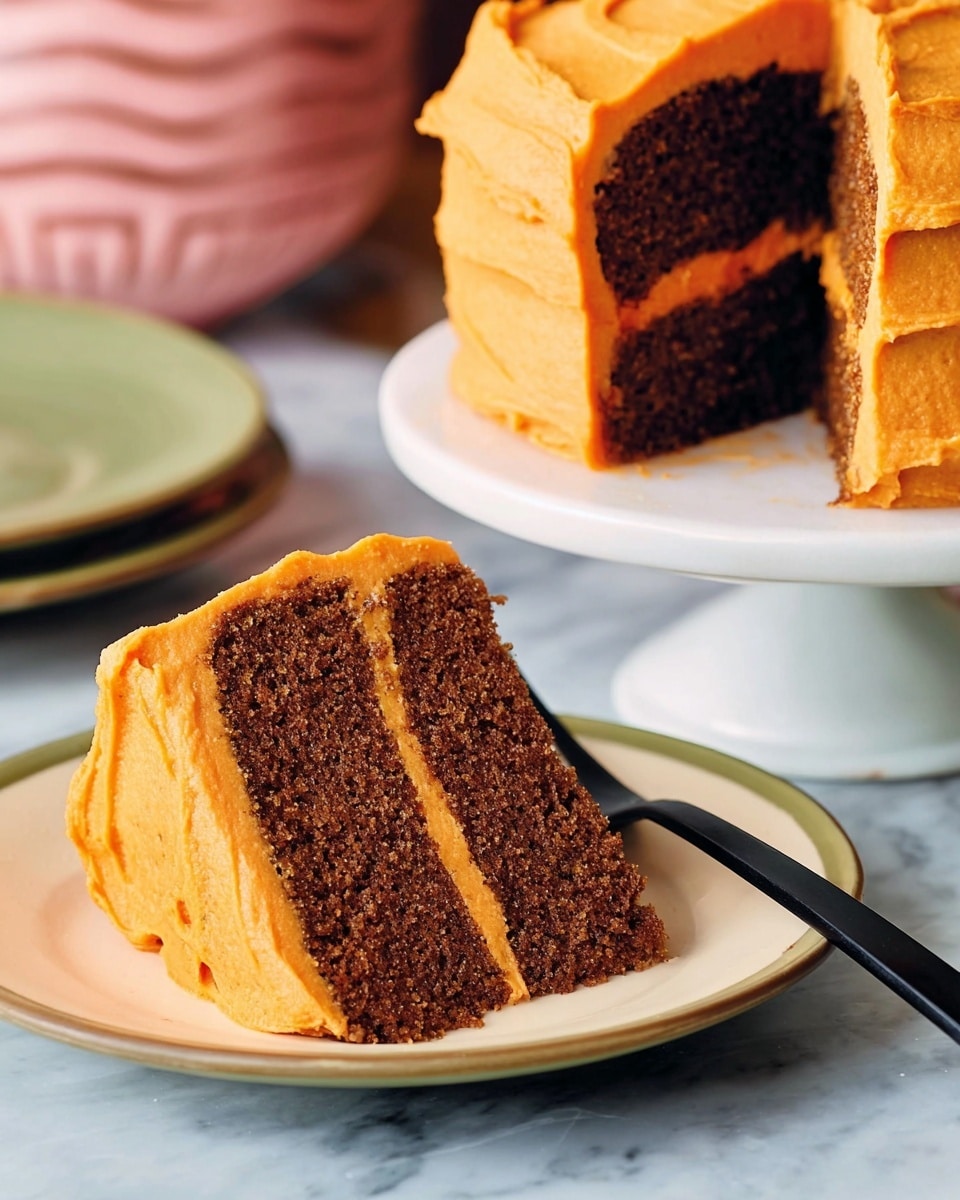
- Step 19: Frost the cake again with a thicker layer, creating vertical ridges around the cake with a spatula to mimic pumpkin texture.
- Step 20: Place the chocolate-coated cake cone stem into the hole on top. Use remaining melted chocolate to pipe a face if desired.
- Step 21: Store any leftover cake covered at room temperature for up to 4 days.
Tips & Variations
- Use fresh pumpkin pie spice or make your own blend for the best flavor.
- Swap vegetable oil for melted coconut oil for a subtle tropical twist.
- The frosting can be prepared up to 3 days ahead; store covered at room temperature and rewhip before use.
- Add chopped pecans or walnuts to the batter for extra crunch.
- Use natural food coloring to keep the frosting vibrant without artificial dyes.
Storage
Store the bundt cake covered at room temperature for up to 4 days. Avoid refrigerating as it may dry the cake out. If needed, reheat slices gently in the microwave for 10-15 seconds to refresh texture before serving.
How to Serve
Serve this delicious recipe with your favorite sides.
FAQs
Can I use canned pumpkin instead of fresh pumpkin purée?
Yes, canned pumpkin purée works perfectly and provides a consistent texture and flavor. Just make sure it’s 100% pumpkin without added sugars or spices.
What can I substitute if I don’t have a mini Bundt pan?
If you don’t have mini Bundt pans, you can bake this cake in a standard loaf pan or regular cake pan. Adjust baking time as needed, checking doneness with a toothpick.
PrintThe Great Pumpkin Bundt Cake Recipe
This Great Pumpkin Bundt Cake is a moist, spiced cake infused with pumpkin purée and pumpkin pie spice, perfect for autumn celebrations. It is baked in mini Bundt pans to create a spherical pumpkin shape, frosted with creamy vanilla buttercream tinted with natural orange coloring, and crowned with a chocolate-covered ice cream cone as the stem. This festive cake combines warm flavors and a charming presentation ideal for Halloween or fall gatherings.
- Prep Time: 25 minutes
- Cook Time: 30 minutes
- Total Time: 1 hour 55 minutes
- Yield: 1 pumpkin-shaped Bundt cake, serves 8-10 1x
- Category: Cake
- Method: Baking
- Cuisine: American
- Diet: Vegetarian
Ingredients
Cake
- 1 1/3 cups (150g) King Arthur Golden Wheat Flour
- 1 tablespoon King Arthur Pumpkin Pie Spice
- 1 teaspoon baking powder
- 3/4 teaspoon table salt
- 1/4 teaspoon baking soda
- 1 1/4 cups (284g) pumpkin purée
- 1 cup (213g) light brown sugar or dark brown sugar, packed
- 1/2 cup (99g) vegetable oil
- 2 large eggs
- 2 teaspoons King Arthur Pure Vanilla Extract
Frosting
- 10 tablespoons (141g) butter, room temperature
- 1/8 teaspoon table salt
- 5 cups (565g) confectioners’ sugar, sifted if lumpy; divided
- 1 tablespoon (14g) vanilla bean paste or King Arthur Pure Vanilla Extract
- 1/4 cup (57g) milk, at room temperature; divided
- 1 packet natural orange food coloring
- 2 teaspoons water
Decoration
- 1/4 cup (43g) semisweet chocolate wafers or semisweet chocolate chips
- 1 flat-bottomed cake cone (for pumpkin stem)
Instructions
- Preheat and prepare pans: Preheat your oven to 350°F (175°C). Lightly grease two mini Bundt pans (6″ pans with a 2-cup capacity are ideal) to ensure easy cake release.
- Mix dry ingredients: In a small bowl, whisk together the flour, pumpkin pie spice, baking powder, salt, and baking soda. Set aside for later incorporation.
- Combine wet ingredients: In a medium bowl, whisk together the pumpkin purée, brown sugar, vegetable oil, eggs, and vanilla extract until smooth and lump-free.
- Combine wet and dry mixtures: Gradually add the dry ingredient mixture to the wet mixture, whisking gently until just combined and no dry streaks remain.
- Fill pans and smooth batter: Divide the batter evenly between the two prepared Bundt pans, about 1 1/2 cups or 440g per pan. Use a small offset spatula to smooth the tops for even baking.
- Bake the cakes: Bake for 28 to 32 minutes until a toothpick inserted in the center comes out clean and the cake springs back when gently pressed.
- Cool cakes: Remove the cakes from the oven and allow to cool in the pans for 10 minutes. Then invert onto a wire rack to cool completely, approximately 1 hour.
- Make the frosting: Using a stand mixer with a flat beater or an electric hand mixer, beat butter and salt on medium speed until smooth (2-3 minutes), scraping sides as needed.
- Add sugar to frosting: With mixer on low, add about half (2 1/2 cups) of the confectioners’ sugar and blend until incorporated.
- Add flavor and milk: Add vanilla and 2 tablespoons of milk to the frosting, beat until fluffy.
- Add remaining sugar and milk: Gradually add remaining confectioners’ sugar and milk with mixer on low, then increase to medium speed and beat until smooth and fully incorporated.
- Color the frosting: In a small microwave-safe bowl, combine the orange food coloring packet with water and microwave in 2-second intervals until dissolved and smooth. Add 1 teaspoon of this mixture to the frosting and beat on high speed until light and fluffy. Add more coloring, 1/4 teaspoon at a time, to reach desired shade.
- Melt chocolate for stem: In a small microwave-safe bowl, melt the semisweet chocolate in 20-second increments at 50% power, stirring between intervals until smooth. Alternatively, melt over simmering water in a heatproof bowl.
- Prepare chocolate-coated cone: Trim about 3/4″ off the top rim of the cake cone with a serrated knife. Spread melted chocolate evenly over the cone and place upright on parchment or a small plate. Refrigerate 15-20 minutes until the chocolate is fully set.
- Trim cake bottoms: Once cooled, trim the domed bottom sides of each mini Bundt cake with a serrated knife so they can sit flat when stacked.
- Assemble pumpkin shape: Place one Bundt cake trimmed side up on a serving plate. Spread 1/2 cup (about 150g) frosting evenly over the top. Place the second cake trimmed-side down on top to form a pumpkin sphere.
- Apply crumb coat: Frost the entire cake with a thin layer of frosting to seal in crumbs. Refrigerate for 15 minutes to set.
- Final frosting and decoration: Apply a second thicker layer of frosting, using a small offset spatula to create vertical ridges reminiscent of a pumpkin surface. Place the chocolate-coated cone stem into the hole on top. Use remaining melted chocolate to pipe a jack-o’-lantern face if desired.
- Storage: Store leftover cake covered at room temperature for up to 4 days.
Notes
- The cake pans used are mini Bundt pans with a 2-cup capacity, ideal for creating the pumpkin shape.
- The frosting can be prepared up to 3 days in advance and stored at room temperature in a covered container; re-whip before use for best texture.
- Use natural orange food coloring to color the frosting for a vibrant but natural look.
- Trimming the domed bottoms of the cakes ensures a stable, flat surface for stacking to form the pumpkin shape.
- Refrigerating the cake after the crumb coat helps set the frosting and makes final decorating easier.
- Chocolate piping is optional and adds a personalized touch to the pumpkin’s face.
- Store the finished cake covered at room temperature; avoid refrigeration to prevent drying the cake.
Keywords: pumpkin cake, Bundt cake, pumpkin dessert, fall dessert, Halloween cake, pumpkin bundt, spiced cake, vanilla buttercream, seasonal dessert