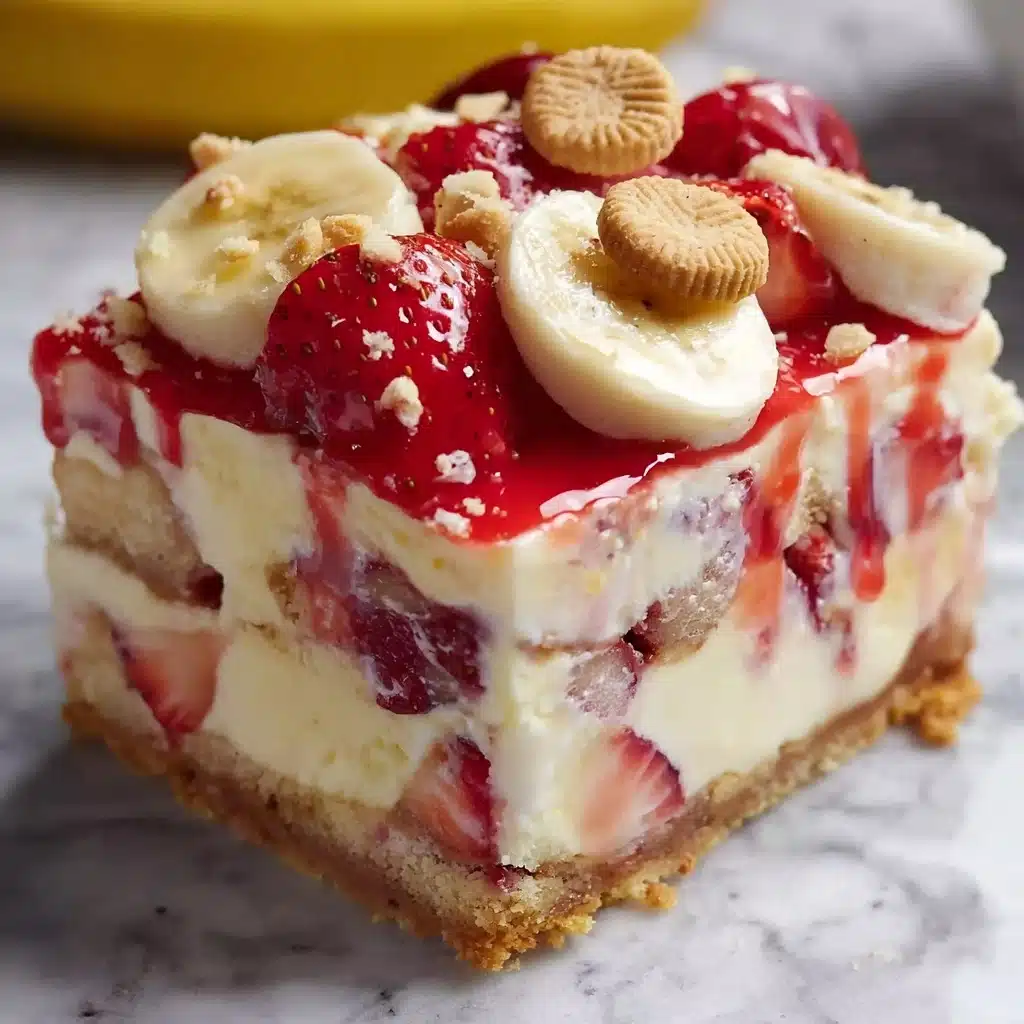
Strawberry Banana Pudding Dream Recipe
If you’re craving a dessert that feels like a warm hug from the inside out, the Strawberry Banana Pudding Dream is exactly what you need. This luscious treat combines the creamy richness of vanilla pudding with the natural sweetness of ripe bananas and fresh strawberries, layered perfectly with crunchy vanilla wafers and a dreamy whipped topping. It’s a harmonious dance of textures and flavors that’s simple to make but incredibly satisfying to eat. Whether it’s for a family gathering or a cozy night in, this Strawberry Banana Pudding Dream will quickly become your go-to indulgence.
Ingredients You’ll Need
The magic of Strawberry Banana Pudding Dream lies in its straightforward ingredients, each chosen to bring a distinct texture, taste, and vibrance to every spoonful. These essentials are easy to find and come together effortlessly for a dessert that dazzles without fuss.
- Vanilla Wafers: Provide a crisp, buttery crunch that beautifully contrasts the creamy pudding.
- Bananas (6 to 8, sliced): Add natural sweetness and a soft, melt-in-your-mouth texture.
- Milk (2 cups): Used to create a smooth, silky consistency in the pudding mixture.
- Fresh Strawberries (1 container): Bring a bright, juicy burst of flavor and lovely color.
- French Vanilla Pudding (1 box, 5 oz.): Forms the luscious base of the dessert with its creamy texture and warm vanilla notes.
- Cream Cheese (1 package, 8 oz.): Adds rich tanginess and depth to the pudding filling.
- Sweetened Condensed Milk (1 can, 14 oz.): Sweetens the pudding naturally and contributes to its velvety texture.
- Whipped Topping (1 container, 12 oz.): Creates a light, airy finish with a creamy contrast to the pudding layers.
How to Make Strawberry Banana Pudding Dream
Step 1: Prepare the Creamy Pudding Mixture
Start by blending the cream cheese and sweetened condensed milk until the mixture is perfectly smooth and creamy; this base gives the dessert its indulgent richness. Next, stir in the French vanilla pudding mix along with the milk, making sure the pudding mixture is smooth and uniformly combined. This step ensures the dessert will have that irresistible creamy texture that every bite needs.
Step 2: Layering the Flavors
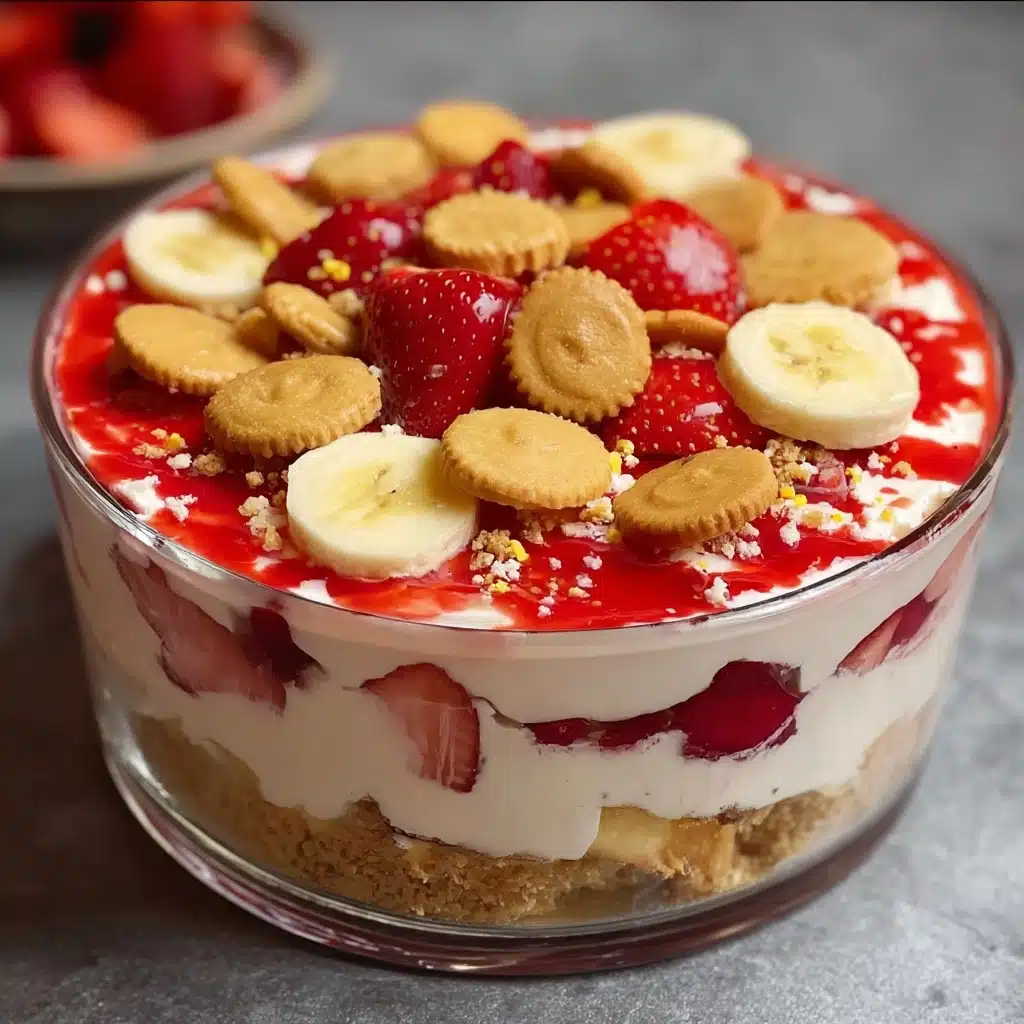
In a large serving dish, begin by creating a solid foundation with a layer of vanilla wafers. On top of that, evenly spread a layer of sliced bananas and fresh strawberries. Then, pour half of your creamy pudding mixture over the fruit and wafers, letting it seep through and meld everything together. This layering is where the Strawberry Banana Pudding Dream truly comes to life, delivering a perfect balance of crunch, fruitiness, and creaminess.
Step 3: Repeat for a Dreamier Texture
Repeat the same layering steps: vanilla wafers, banana and strawberry slices, and then pour on the remaining pudding mixture. Ending with the pudding on top ensures every spoonful has that smooth, dreamy quality you’re looking for.
Step 4: The Whipped Topping Finale
Spread an even layer of the whipped topping over the final pudding layer. The whipped topping adds a light, fluffy finish that contrasts delightfully with the dense pudding layers below, making each bite a pure pleasure. Refrigerate your masterpiece for at least four hours to let all the flavors meld and the wafers soften just enough without losing their texture.
How to Serve Strawberry Banana Pudding Dream
Garnishes
To make your Strawberry Banana Pudding Dream presentation irresistible, dust the top lightly with crushed vanilla wafers or add a few fresh strawberry slices and banana coins as a final pop of color. A sprinkle of toasted coconut or chopped nuts also adds a wonderful texture and visual appeal.
Side Dishes
This pudding stands proudly on its own, but if you want to make your dessert spread extra special, serve it alongside a cup of freshly brewed coffee or a scoop of vanilla bean ice cream. The cool ice cream or warm espresso perfectly complements the creamy sweetness of the pudding.
Creative Ways to Present
Instead of a single large dish, try making individual parfait glasses layered with the Strawberry Banana Pudding Dream ingredients. This personalized approach makes for a charming presentation at parties and allows guests to appreciate each layer visually before digging in.
Make Ahead and Storage
Storing Leftovers
After serving, cover any leftover Strawberry Banana Pudding Dream tightly with plastic wrap or transfer it into an airtight container and store in the refrigerator. It will stay delicious for up to three days, with the layers continuing to meld beautifully as it sits.
Freezing
While this dessert is best enjoyed fresh, you can freeze leftovers by placing them in a freezer-safe container. Keep in mind the texture may change slightly because the whipped topping can lose its fluffiness. Thaw overnight in the refrigerator before serving.
Reheating
This dessert is best served chilled, so reheating is not recommended. Instead, allow refrigerated leftovers to come to a cool room temperature or enjoy them straight from the fridge for the perfect balance of creaminess and freshness.
FAQs
Can I use other fruits besides strawberries and bananas?
Absolutely! While strawberries and bananas create the classic Strawberry Banana Pudding Dream, feel free to experiment with blueberries, raspberries, or peaches for a personalized twist.
Is it possible to make this dessert dairy-free?
Yes, swap out the milk, cream cheese, and whipped topping for your preferred dairy-free alternatives, like almond milk and coconut-based cream cheese and toppings. The taste will be slightly different but still delicious.
How long should I let the pudding chill before serving?
For the best texture and flavor melding, refrigerate the pudding for at least four hours. Overnight chilling will allow the flavors to deepen and the wafers to soften just enough.
Can this dessert be made gluten-free?
Simply substitute the vanilla wafers with a gluten-free cookie option, and your Strawberry Banana Pudding Dream will be safe for those avoiding gluten without losing its charm.
What’s the best way to slice the bananas to prevent browning?
Slice the bananas just before you assemble the dessert and toss them in a little lemon juice to keep them fresh and vibrant, maintaining that appealing look and taste in your pudding.
Final Thoughts
Making the Strawberry Banana Pudding Dream is like creating a little slice of happiness in your kitchen. It’s approachable, fun, and absolutely bursting with layers of creamy, fruity goodness. I promise once you try this, you’ll wonder how you ever made pudding any other way. So, gather your ingredients, invite some friends or family, and enjoy the joyful indulgence that this dreamy dessert brings to every occasion.
PrintStrawberry Banana Pudding Dream Recipe

A luscious and creamy Strawberry Banana Pudding Dream that layers crisp vanilla wafers, ripe bananas, fresh strawberries, and a rich vanilla pudding mixture topped with fluffy whipped cream. Perfect as a refreshing dessert for family gatherings or special occasions.
- Prep Time: 20 minutes
- Cook Time: 0 minutes
- Total Time: 4 hours 20 minutes (including chilling)
- Yield: 8 to 10 servings 1x
- Category: Dessert
- Method: No-Bake Assembly
- Cuisine: American
- Diet: Vegetarian
Ingredients
Main Ingredients
- 2 boxes Vanilla Wafers
- 6 to 8 ripe bananas, sliced
- 1 container fresh strawberries, hulled and sliced
- 2 cups whole milk
Pudding Mixture
- 1 (5 oz.) box French Vanilla pudding mix
- 1 (8 oz.) package cream cheese, softened
- 1 (14 oz.) can sweetened condensed milk
Topping
- 1 (12 oz.) container whipped topping (such as Cool Whip), thawed
Instructions
- Prepare the pudding mixture: In a mixing bowl, beat together the softened cream cheese and sweetened condensed milk until the mixture is smooth and creamy with no lumps.
- Add pudding and milk: Stir in the French Vanilla pudding mix and gradually add the 2 cups of milk. Continue stirring until all ingredients are thoroughly combined and the pudding begins to thicken.
- Layer the dessert: In a large serving dish or trifle bowl, spread a layer of vanilla wafers to cover the bottom evenly. Next, add a layer of sliced bananas and then a layer of fresh strawberries on top of the wafers.
- Add pudding mixture: Pour half of the prepared pudding mixture evenly over the fruit and wafers layer, smoothing it carefully to cover the layers beneath.
- Repeat layers: Repeat the vanilla wafers, banana slices, and strawberry layers followed by the remaining pudding mixture, ensuring the last layer is the pudding mixture.
- Top with whipped topping: Spread the whipped topping over the final pudding layer evenly using a spatula to create a smooth, fluffy surface.
- Chill before serving: Cover the dish with plastic wrap and refrigerate for at least 4 hours or overnight to allow the flavors to meld and the wafers to soften slightly, creating a creamy texture.
Notes
- For best flavor and texture, use ripe but firm bananas to prevent browning and mushiness.
- You can substitute low-fat milk if you want a lighter version, but whole milk gives the creamiest result.
- The whipped topping can be homemade whipped cream if preferred for a fresher taste.
- Store leftovers covered in the refrigerator and consume within 2-3 days for optimal freshness.
- Use fresh strawberries that are firm and sweet; frozen strawberries are not recommended as they can release excess water and dilute the dessert.
Nutrition
- Serving Size: 1 cup
- Calories: 280
- Sugar: 28g
- Sodium: 150mg
- Fat: 12g
- Saturated Fat: 7g
- Unsaturated Fat: 4g
- Trans Fat: 0g
- Carbohydrates: 38g
- Fiber: 2g
- Protein: 4g
- Cholesterol: 30mg
Keywords: Strawberry Banana Pudding, No Bake Dessert, Creamy Pudding Recipe, Layered Pudding Dessert, Summer Dessert, Fruit Pudding
