Raspberry Chocolate Lava Cupcakes Recipe
Introduction
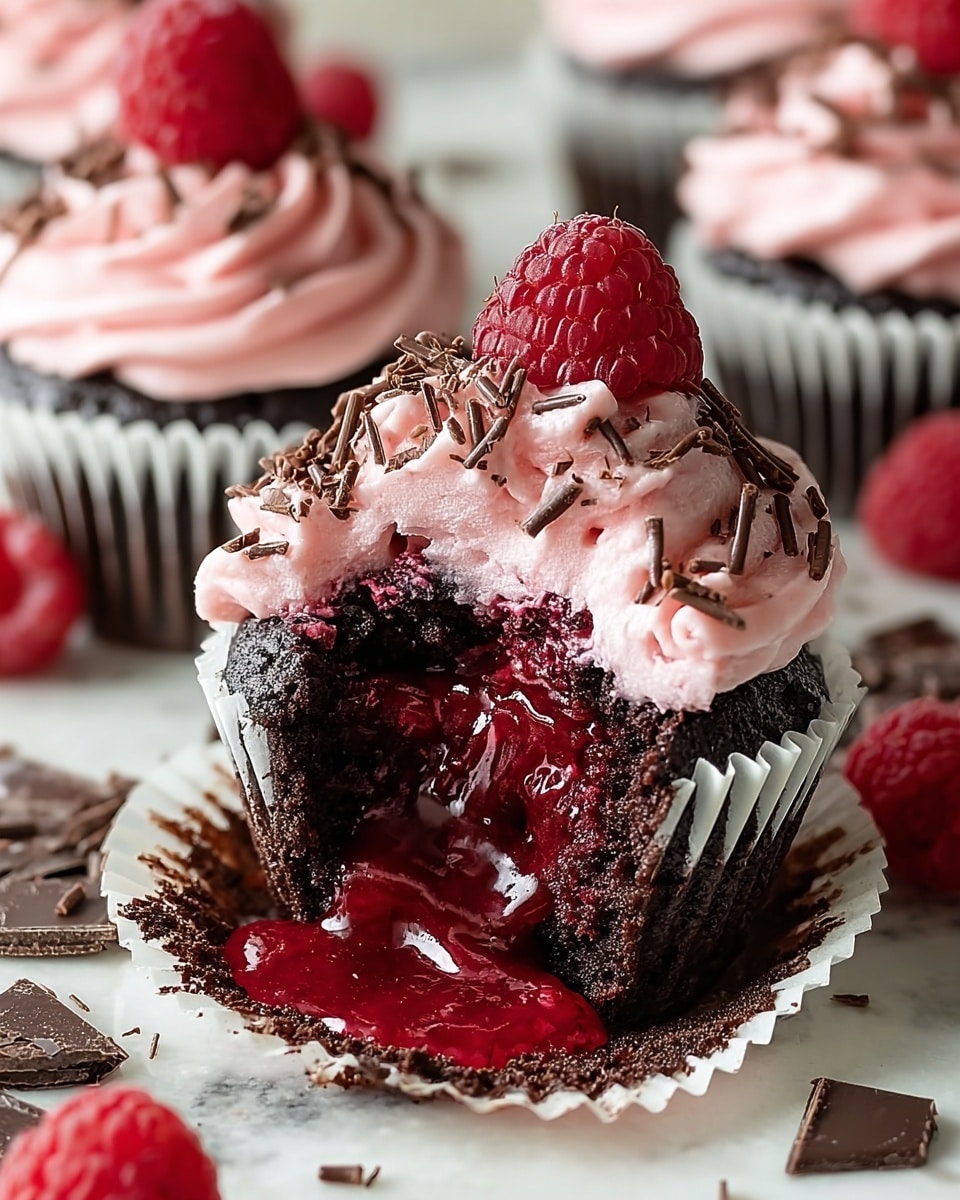
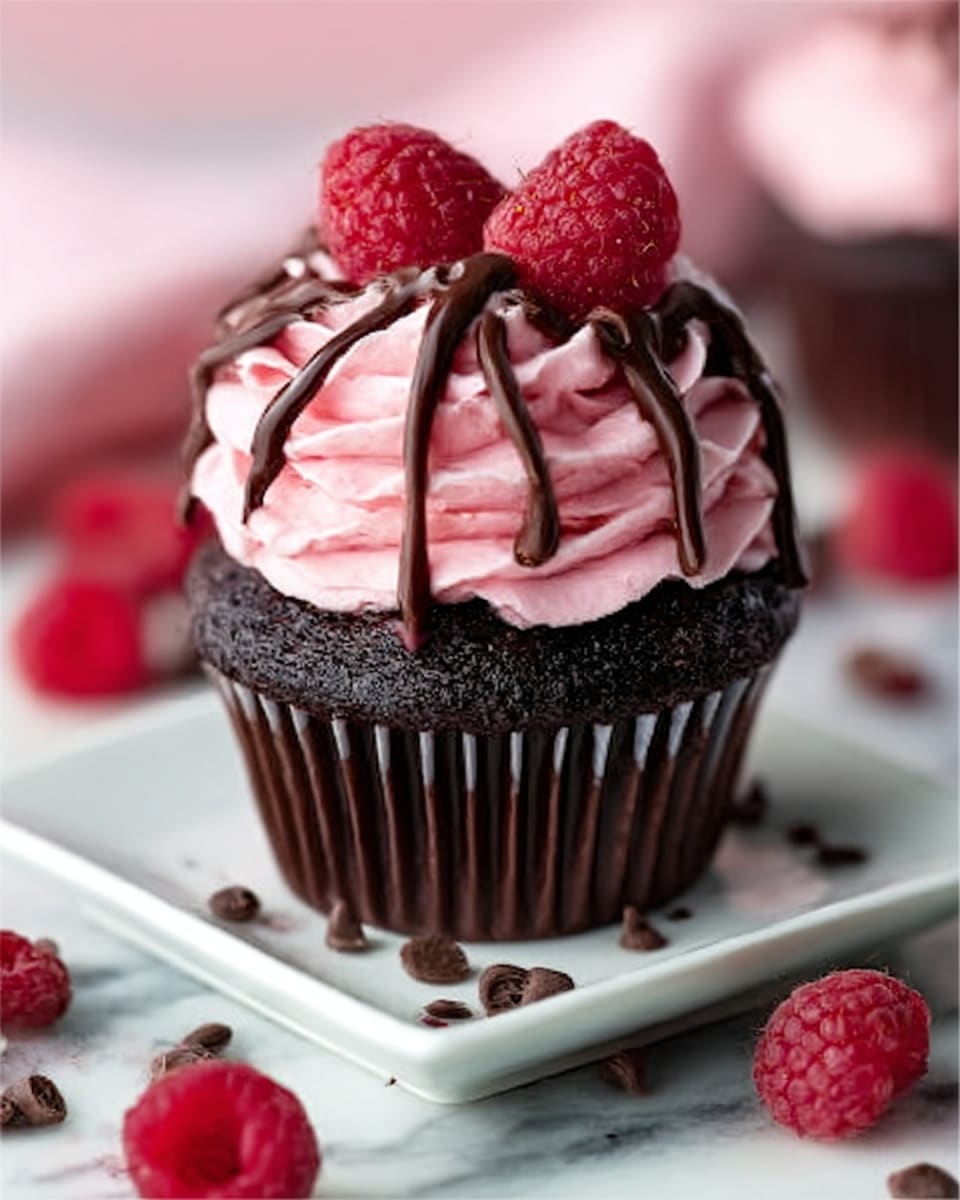
These Raspberry Chocolate Lava Cupcakes combine rich, moist chocolate cake with a luscious raspberry center, creating a delightful surprise with every bite. Topped with a creamy raspberry buttercream and garnished with fresh raspberries and chocolate shavings, they’re perfect for any special occasion or a decadent treat.
Ingredients
- 1 cup all-purpose flour
- 1/2 cup unsweetened cocoa powder
- 3/4 teaspoon baking soda
- 1/4 teaspoon salt
- 1/2 cup unsalted butter, softened (for batter)
- 1 cup sugar
- 2 large eggs
- 1 teaspoon vanilla extract (for batter)
- 1/2 cup buttermilk
- 1/2 cup boiling water
- 1/2 cup raspberry preserves
- Fresh raspberries for garnish
- 1 cup unsalted butter, softened (for buttercream)
- 3 1/2 cups powdered sugar
- 1/4 cup raspberry puree
- 1 teaspoon vanilla extract (for buttercream)
- A pinch of salt
- Dark chocolate shavings for garnish
Instructions
- Step 1: Preheat your oven to 350°F (175°C) and line a muffin tin with cupcake liners.
- Step 2: In a medium bowl, whisk together the flour, cocoa powder, baking soda, and salt.
- Step 3: In a large bowl, cream the softened butter and sugar until light and fluffy. Add the eggs one at a time, beating well after each addition, then mix in the vanilla extract.
- Step 4: Alternately add the dry ingredients and buttermilk to the butter mixture, beginning and ending with the dry ingredients. Stir in the boiling water until the batter is smooth.
- Step 5: Fill each cupcake liner halfway with batter. Spoon about a teaspoon of raspberry preserves into the center of each and cover with more batter until the liners are about three-quarters full.
- Step 6: Bake for 18-22 minutes or until a toothpick inserted into the edge comes out clean. Allow cupcakes to cool completely.
- Step 7: To make the buttercream, beat the butter until creamy. Gradually add the powdered sugar, then mix in raspberry puree, vanilla extract, and a pinch of salt until smooth and fluffy.
- Step 8: Frost the cooled cupcakes with the raspberry buttercream. Garnish each with fresh raspberries and dark chocolate shavings.
Tips & Variations
- For a more intense raspberry flavor, spoon a little fresh raspberry puree into the center alongside the preserves before baking.
- Use high-quality cocoa powder for deeper chocolate taste.
- If buttermilk is unavailable, substitute with regular milk mixed with 1/2 teaspoon of lemon juice or vinegar, let sit for 5 minutes.
- Experiment with topping by adding a dusting of powdered sugar or a drizzle of melted chocolate.
Storage
Store the cupcakes in an airtight container at room temperature for up to 2 days or in the refrigerator for up to 5 days. Bring refrigerated cupcakes to room temperature before serving for best texture. The buttercream frosting may soften if left out too long, so keep them cool in warm climates.
How to Serve
Serve this delicious recipe with your favorite sides.
FAQs
Can I make these cupcakes ahead of time?
Yes, you can bake the cupcakes a day in advance and refrigerate them. Frost just before serving for the freshest taste and appearance.
What can I use instead of raspberry preserves?
If you don’t have raspberry preserves, you can substitute with any fruit jam or curd you prefer, such as strawberry or blackberry, to create a similar fruity center.
PrintRaspberry Chocolate Lava Cupcakes Recipe
Indulge in these decadent Raspberry Chocolate Lava Cupcakes, featuring a rich chocolate cake filled with a gooey raspberry preserve center. Topped with a silky raspberry buttercream and garnished with fresh raspberries and dark chocolate shavings, these cupcakes offer a perfect balance of sweet and tangy flavors, ideal for any special occasion or a delightful treat.
- Prep Time: 20 minutes
- Cook Time: 20 minutes
- Total Time: 40 minutes
- Yield: 12 cupcakes 1x
- Category: Dessert
- Method: Baking
- Cuisine: American
Ingredients
Cake Ingredients
- 1 cup all-purpose flour
- 1/2 cup unsweetened cocoa powder
- 3/4 teaspoon baking soda
- 1/4 teaspoon salt
- 1/2 cup unsalted butter, softened
- 1 cup sugar
- 2 large eggs
- 1 teaspoon vanilla extract
- 1/2 cup buttermilk
- 1/2 cup boiling water
- 1/2 cup raspberry preserves
Buttercream Frosting
- 1 cup unsalted butter, softened
- 3 1/2 cups powdered sugar
- 1/4 cup raspberry puree
- 1 teaspoon vanilla extract
- A pinch of salt
Garnish
- Fresh raspberries for garnish
- Dark chocolate shavings for garnish
Instructions
- Preheat Oven: Preheat your oven to 350°F (175°C). Line a muffin tin with cupcake liners to prepare for baking.
- Mix Dry Ingredients: In a medium bowl, whisk together the all-purpose flour, unsweetened cocoa powder, baking soda, and salt until well combined.
- Cream Butter and Sugar: In a large bowl, cream the softened unsalted butter and sugar together until the mixture becomes light and fluffy. Beat in the eggs one at a time, ensuring each is well incorporated before adding the next. Stir in the vanilla extract for added flavor.
- Combine Ingredients: Alternately add the dry ingredients and buttermilk to the butter mixture, starting and ending with the dry ingredients. Mix until just combined. Stir in the boiling water until the batter is smooth and even.
- Prepare Cupcakes: Fill each cupcake liner halfway with the chocolate batter. Spoon about a teaspoon of raspberry preserves into the center of each liner, then cover with more batter until they are about three-quarters full to create a lava center.
- Bake: Place the muffin tin in the preheated oven and bake for 18 to 22 minutes, or until a toothpick inserted into the edge of the cupcake comes out clean. Remove from oven and allow to cool completely on a wire rack.
- Make Buttercream: Beat softened butter until creamy. Gradually add powdered sugar while continuing to beat. Mix in raspberry puree, vanilla extract, and a pinch of salt until the frosting is smooth, fluffy, and spreadable.
- Frost and Garnish: Once the cupcakes have cooled completely, frost them generously with the raspberry buttercream. Garnish each cupcake with fresh raspberries and dark chocolate shavings to enhance both appearance and flavor.
Notes
- Ensure the cupcakes cool completely before frosting to prevent the buttercream from melting.
- The boiling water in the batter helps to intensify the chocolate flavor and create a moist crumb.
- You can substitute raspberry preserves with any other fruit jam of your choice to create different flavor combinations.
- For a dairy-free version, substitute butter and buttermilk with plant-based alternatives.
- Store cupcakes in an airtight container at room temperature for up to 2 days or refrigerate for up to 5 days.
Keywords: chocolate lava cupcakes, raspberry chocolate cupcakes, chocolate cupcakes with raspberry filling, raspberry buttercream cupcakes, chocolate raspberry dessert