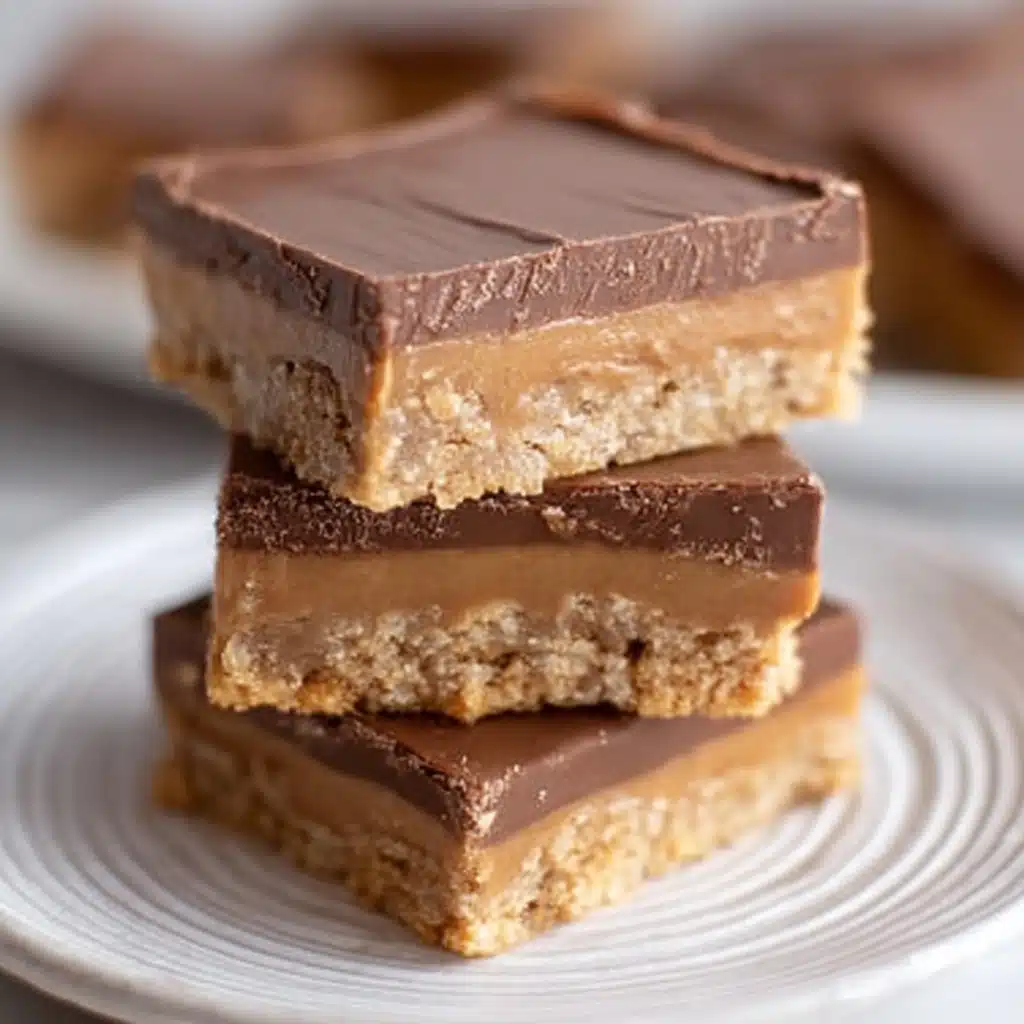
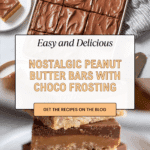
Lunch Lady Peanut Butter Bars Recipe
If you’ve got a craving for something sweet, nutty, and totally nostalgic, get ready for a treat: Lunch Lady Peanut Butter Bars are pure magic! These bars capture everything we love about classic school cafeteria desserts: a supremely soft and chewy peanut butter-oat base, a blanket of creamy peanut butter, and a swirl of fudgy chocolate frosting on top. Every bite brings back those carefree days of lunchroom chatter and trading desserts with friends—except these homemade bars taste even better than you remember. Whether you’re sharing them at a bake sale or sneaking a late-night slice, Lunch Lady Peanut Butter Bars will bring smiles all around!

Ingredients You’ll Need
Let’s talk ingredients—these are straightforward, pantry-friendly items, but don’t be fooled by their simplicity! Each one helps create the dreamy texture, rich flavor, and perfect bite that makes Lunch Lady Peanut Butter Bars so irresistible.
- Salted Butter: Adds a rich, creamy base and balances the sweetness beautifully.
- Granulated Sugar: Gives the bars structure and a bit of that classic sweetness.
- Light Brown Sugar: Deepens the flavor with a subtle molasses note and tenderness.
- Creamy Peanut Butter: The star ingredient—make sure to use a classic creamy peanut butter for the right texture and nutty punch.
- Large Eggs: Bind everything together and keep the bars delightfully soft.
- Vanilla Extract: Rounds out all the flavors with warm, comforting aromas.
- All-Purpose Flour: The structure-maker that keeps these bars perfectly chewy.
- Old-Fashioned Oats: Gives the bars heartiness and that nostalgic lunch lady magic.
- Baking Soda: Just enough leavening for a light, tender crumb.
- Salt: Elevates the flavors and balances the sweetness—don’t skip it!
- Powdered Sugar: Dissolves seamlessly into the frosting for a smooth, creamy finish.
- Cocoa Powder: Adds deep chocolate flavor—an essential part of that classic school-lunch-style topping.
- Milk: Makes the frosting spreadable and luscious.
How to Make Lunch Lady Peanut Butter Bars
Step 1: Prepare Your Pan and Preheat the Oven
First things first—crank your oven to 350°F and give a half-sheet baking pan (13″x18″) a generous coat of baking spray. It seems basic, but this step is the secret to easy, clean slices later. A little prep now saves a lot of sticking and mess after baking!
Step 2: Whip Up the Peanut Butter Bar Base
Grab your stand mixer or a big bowl with a hand mixer. Cream together butter, granulated sugar, brown sugar, and a hefty cup of that creamy peanut butter. The mixture should be fluffy and lighter in color—this takes about two to three minutes. Next, blend in the eggs and vanilla, making sure to scrape down the sides so every bit gets mixed in. This creates the rich, tender cookie base that every Lunch Lady Peanut Butter Bars fan dreams about!
Step 3: Mix in the Dry Ingredients
Add the flour, oats, baking soda, and salt all at once. Mix just until you don’t see streaks of flour—over-mixing will make the bars tough. The oats add chewiness while the baking soda lifts the bar slightly for a perfect bite. Spread this thick, doughy goodness evenly in your prepped pan using a spatula.
Step 4: Bake the Bars
Slide your pan into the oven and bake for 15 to 17 minutes. You’re looking for golden edges and a center that’s still a tad soft—don’t overbake! Remember, the bars will keep setting as they cool, so take them out while the center still looks underdone.
Step 5: Drizzle the Peanut Butter Layer
Before you let the bars cool, pop the remaining 1 ½ cups of peanut butter in the microwave for a minute to melt it. Drizzle the warm peanut butter over the hot bars and use a spatula or knife to spread it in an even layer. This gooey step locks in moisture and amps up the peanut butter flavor. Let them cool until the peanut butter is set—you can speed things up in the fridge if you’re impatient!
Step 6: Make and Frost with Chocolate Frosting
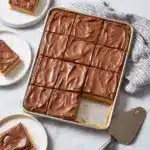
While the bars are cooling, beat together softened butter, powdered sugar, cocoa powder, milk, and vanilla until smooth and spreadable. Once the bars are completely cool and the peanut butter layer has set, finish the magic by spreading this dreamy chocolate frosting all over. Slice into squares and bask in the glory!
How to Serve Lunch Lady Peanut Butter Bars
Garnishes
You can absolutely serve these bars straight up, but if you want to dress them up, sprinkle on a handful of mini chocolate chips, crushed salted peanuts, or a light dusting of powdered sugar. A drizzle of extra melted peanut butter or chocolate sauce makes them photo-ready for any occasion.
Side Dishes
Lunch Lady Peanut Butter Bars play well with simple sides. Offer some icy-cold milk or a cup of hot coffee—both balance the richness perfectly. For a slightly fancier twist, pair with fresh strawberries or banana slices for a hit of fruitiness that complements that nutty sweetness.
Creative Ways to Present
Looking to impress? Stack the squares into towers on a vintage cake stand for a retro bake sale feel, or wrap individual bars in parchment paper with a bit of bakers twine for an on-the-go treat. If you love bite-sized desserts, cut the bars smaller and serve in mini paper cups for a crowd-pleasing party platter.
Make Ahead and Storage
Storing Leftovers
Lunch Lady Peanut Butter Bars keep beautifully! Store them in an airtight container at room temperature for up to 4 days. For extra freshness, pop a slice of bread in the container to keep them soft (just like grandma used to do with cookies).
Freezing
If you want to squirrel away some bars for future cravings, you’re in luck—these freeze like a dream. Place the cut squares in a single layer on a baking sheet to freeze until firm, then transfer to a freezer bag or airtight container. They’ll stay delicious for up to three months. Thaw at room temp, and you’re set!
Reheating
Prefer your bars just a little warm and melty? Pop one in the microwave for 5-10 seconds—it’ll taste like it’s fresh from the oven, and the frosting will get extra luscious. Just be careful not to overdo it, or you’ll melt the frosting completely.
FAQs
Can I use crunchy peanut butter instead of creamy?
Absolutely! Using crunchy peanut butter will add a lovely bit of texture to the bars and a little extra peanut crunch. Just keep in mind that the bars might be a touch more crumbly.
Are Lunch Lady Peanut Butter Bars safe for school events with nut allergies?
Unfortunately, these bars are not suitable for those with nut allergies due to the peanut butter. If you need a nut-free version, you could try sunflower butter, but always double-check with your group’s allergy guidelines first.
Can I cut this recipe in half?
Yes, if you don’t need a full tray, you can halve all the ingredients and bake in a 9×13-inch pan. Baking time may be slightly shorter, so check for doneness around the 12-minute mark.
Can I make Lunch Lady Peanut Butter Bars gluten free?
You can! Replace the all-purpose flour with a cup-for-cup gluten-free flour blend and ensure your oats are certified gluten-free. The results are still chewy, rich, and totally crave-worthy.
How do I get clean squares when cutting?
Chill the bars so the frosting sets firmly, then use a sharp knife dipped in hot water (and wiped dry) to make slices. Wipe the blade between cuts for those perfect bakery-style edges.
Final Thoughts
Whether you remember them from your school days or you’re tasting them for the first time, there’s something utterly joyful about pulling a pan of Lunch Lady Peanut Butter Bars from the oven. Invite a few friends over or surprise your family—however you serve them, these retro treats are guaranteed to make memories a little bit sweeter. Go ahead, don’t wait another minute to enjoy that first chewy-chocolatey bite!
PrintLunch Lady Peanut Butter Bars Recipe
These Lunch Lady Peanut Butter Bars are a classic treat that combines a chewy peanut butter oatmeal cookie base with a rich chocolate frosting. Perfect for satisfying your sweet tooth!
- Prep Time: 20 minutes
- Cook Time: 17 minutes
- Total Time: 37 minutes
- Yield: 24 bars 1x
- Category: Dessert
- Method: Baking
- Cuisine: American
- Diet: Vegetarian
Ingredients
Bars
- 1 cup salted butter, softened (227g)
- 1 cup granulated sugar (200g)
- 1 cup packed light brown sugar (200g)
- 2 1/2 cups creamy peanut butter, divided
- 2 large eggs
- 2 teaspoons vanilla extract
- 2 cups all-purpose flour, scooped & leveled (282g)
- 2 cups old-fashioned oats
- 1 teaspoon baking soda
- 1 teaspoon salt
Frosting
- 1/2 cup salted butter, softened (114g)
- 3 cups powdered sugar
- 4 tablespoons cocoa powder
- 1/4 cup milk
- 2 teaspoons vanilla extract
Instructions
- Preheat oven to 350°F: Spray a half-sheet baking sheet (13″x18″) with baking spray.
- Prepare the cookie base: Beat the butter, granulated sugar, brown sugar, and 1 cup of peanut butter until creamy. Add eggs and vanilla, mix. Add flour, oats, baking soda, and salt. Spread into pan and bake 15-17 minutes.
- Add peanut butter topping: Melt remaining peanut butter and drizzle over hot base. Let cool.
- Make chocolate frosting: Beat butter, powdered sugar, cocoa, milk, and vanilla until smooth. Spread over cooled bars. Cut into squares.
Notes
- You can chill the bars to speed up setting the peanut butter layer.
- Store these bars in an airtight container for up to a week.
Nutrition
- Serving Size: 1 bar
- Calories: 320
- Sugar: 24g
- Sodium: 210mg
- Fat: 17g
- Saturated Fat: 8g
- Unsaturated Fat: 7g
- Trans Fat: 0g
- Carbohydrates: 38g
- Fiber: 2g
- Protein: 6g
- Cholesterol: 35mg
Keywords: Peanut Butter Bars, Lunch Lady, Dessert, Chocolate Frosting, Oatmeal Cookies