Cool Whip Easter Egg Decorations Recipe
Introduction
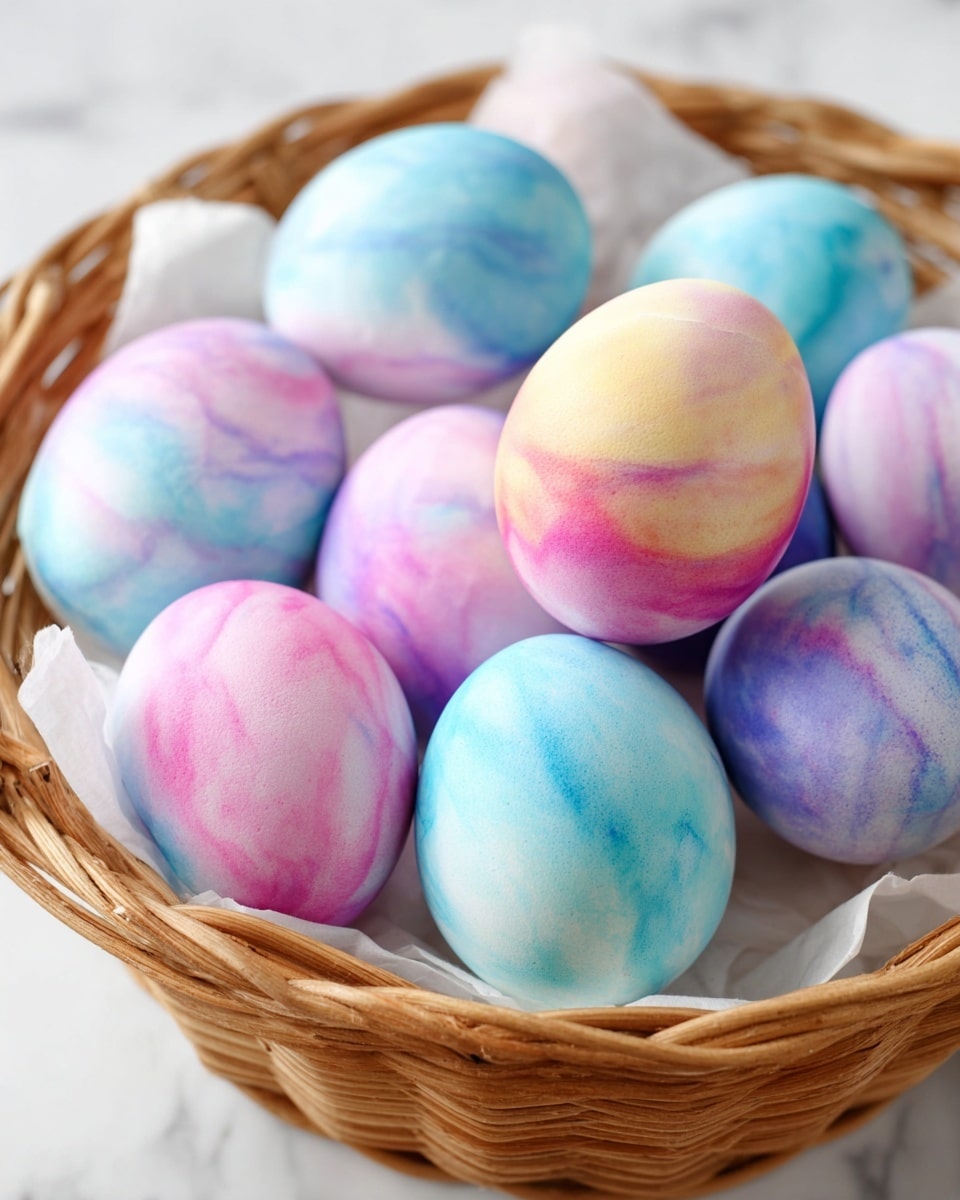
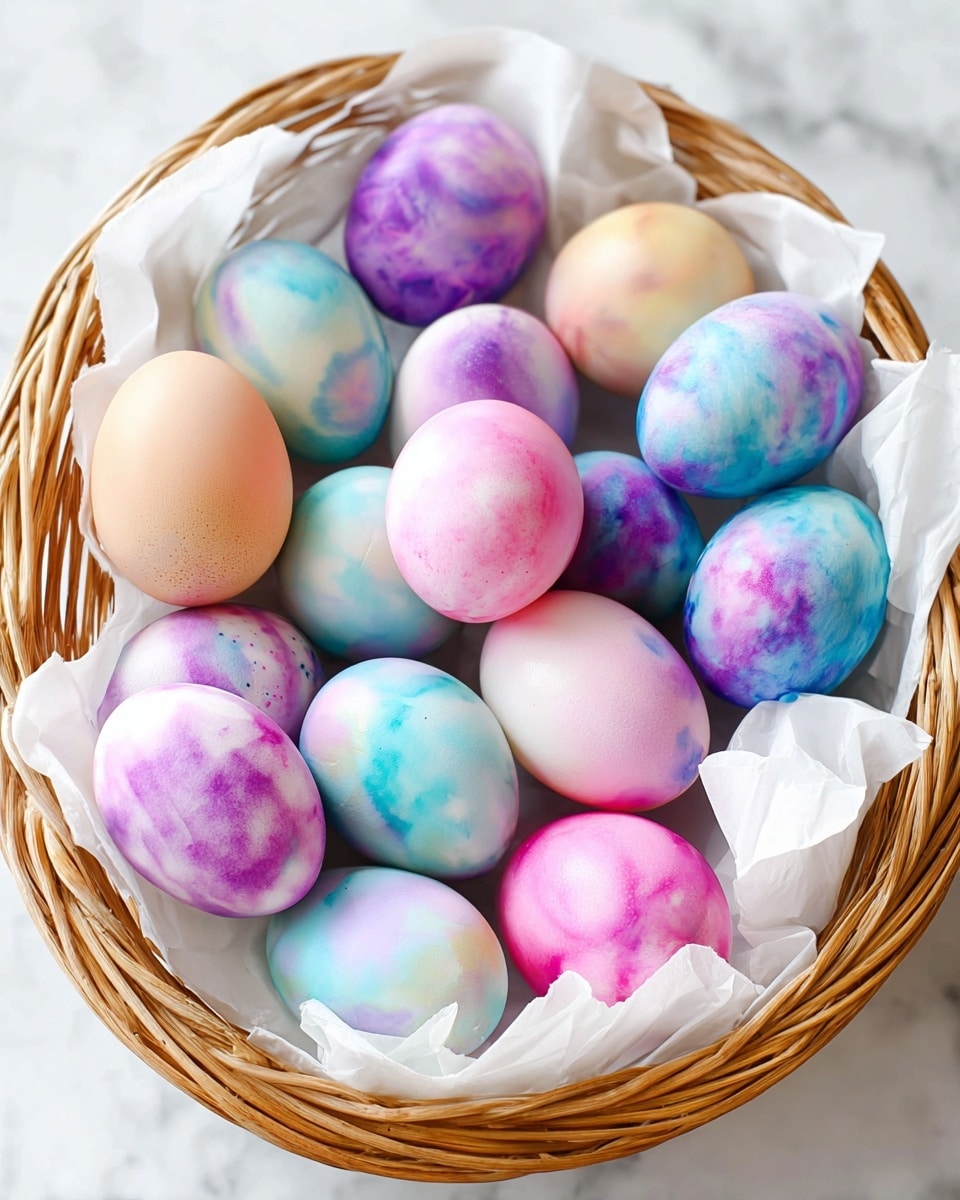
Cool Whip Easter Eggs are a fun and colorful twist on traditional egg dyeing. Using whipped topping and food coloring, these eggs develop beautiful, marbled patterns that make great festive decorations or treats. This easy method is perfect for families looking to add a creative spin to their Easter celebrations.
Ingredients
- 12 large hard boiled eggs (cooled completely; white eggs preferable)
- 3–4 cups white vinegar
- 1 large tub Cool Whip (1 litre or 4 cups, roughly 12 ounces)
- Gel food coloring
Instructions
- Step 1: Place the hard boiled eggs in a bowl and cover them with the vinegar. Allow them to soak for about 2–3 minutes. For best results, do this in two batches of 6 eggs each to ensure they are fully covered and to avoid using excess vinegar.
- Step 2: Remove the eggs from the vinegar and dry them thoroughly with paper towels. Be careful not to oversoak the eggs, as vinegar can start to eat away at the shells.
- Step 3: Spoon Cool Whip into each muffin cup of a muffin tin, filling each cup completely. Alternatively, spread the Cool Whip evenly in an 8×13-inch baking dish.
- Step 4: Wearing food-safe disposable gloves to prevent staining, add drops of gel food coloring onto the Cool Whip. Use a toothpick to swirl the colors around. You can choose one color per muffin cup or mix multiple colors for a marbled effect.
- Step 5: Place one egg into each muffin cup and roll it around gently to coat the egg evenly with the colored Cool Whip. Refrigerate the muffin tin for 15 minutes to let the color set.
- Step 6: Rinse each egg under cold water to remove the Cool Whip. Be careful not to rub the eggs, as the color will continue to set as they dry.
- Step 7: Place the eggs on a paper towel-lined baking sheet and let them dry completely. Once dry, store the eggs in the refrigerator until ready to display or eat.
Tips & Variations
- Using white eggs allows the colors to show more vibrantly, but you can experiment with brown eggs for a more muted, rustic look.
- Try using multiple gel food coloring shades in one cup for an even more unique marbled design.
- Wear disposable gloves to keep your hands clean when handling the food coloring and eggs.
- If you don’t have a muffin tin, any shallow dish will work to hold the Cool Whip.
Storage
Store the dyed eggs in the refrigerator in a covered container. They will keep well for up to one week. Because these are hard boiled eggs, consume them within this timeframe for the best freshness. Serve chilled or bring to room temperature before eating.
How to Serve
Serve this delicious recipe with your favorite sides.
FAQs
Will the vinegar soak affect the taste of the eggs?
The short vinegar soak primarily helps prepare the eggshells to absorb the color and shouldn’t noticeably alter the flavor of the eggs.
Can I use regular liquid food coloring instead of gel?
Gel food coloring works best for vibrant, concentrated color and marbling effects, but regular liquid food coloring can also be used. You may need to adjust the amount to avoid thinning the Cool Whip too much.
PrintCool Whip Easter Egg Decorations Recipe

These Cool Whip Easter Eggs are a fun and creative way to dye hard-boiled eggs using a swirling marbled effect created with Cool Whip and food coloring. The process gives a beautiful pastel marbled finish that’s perfect for festive Easter celebrations.
- Prep Time: 15 minutes
- Cook Time: 0 minutes
- Total Time: 30 minutes
- Yield: 12 decorated Easter eggs 1x
- Category: Holiday
- Method: No-Cook
- Cuisine: American
- Diet: Vegetarian
Ingredients
Eggs and Soak
- 12 large hard boiled eggs (cooled completely, white eggs preferable)
- 3–4 cups white vinegar
Dyeing Mixture
- 1 large tub Cool Whip (1 litre or 4 cups or roughly 12 ounces)
- Gel food coloring (various colors as desired)
Instructions
- Soak Eggs in Vinegar: Place 6 hard boiled eggs in a bowl and cover completely with white vinegar. Let soak for 2-3 minutes to prepare the eggshells for dyeing. Do the soaking in two batches to ensure eggs are fully submerged.
- Dry the Eggs: Remove the eggs from the vinegar and gently dry them with paper towels. Avoid soaking too long to prevent the vinegar from eating away the eggshell.
- Prepare Cool Whip Dye Base: Spoon Cool Whip into each cup of a muffin tin, filling each cup completely. Alternatively, spread the Cool Whip evenly in an 8×13 inch baking dish.
- Add and Swirl Food Coloring: Wearing food-safe disposable gloves, add drops of gel food coloring onto the Cool Whip. Use a toothpick to swirl the colors and create a marbled effect. Choose to use a single color per section or multiple colors together.
- Roll Eggs in Cool Whip Mixture: Place one egg into each muffin cup and gently roll it around to coat the entire surface of the egg with the colored Cool Whip. Then transfer the muffin tin to the refrigerator for 15 minutes to set the color.
- Rinse and Dry: Remove the eggs from the Cool Whip and rinse gently under water to remove excess Cool Whip. Be careful not to scrub off the marbled color. Place eggs on a paper towel-lined tray and allow to dry completely.
- Store: Once dry, store the dyed eggs in the refrigerator until ready to serve.
Notes
- Use white eggs for the best vibrant color results.
- Do not soak eggs in vinegar for longer than 3 minutes to prevent shell damage.
- Wear disposable gloves when handling food coloring to avoid staining your hands.
- The dyed eggs may appear muted when wet; allow them to dry for the full vibrant effect.
- You can customize the colors and mixing patterns with different gel food color combinations.
- This method provides a marbled pastel look different from traditional egg dyeing kits.
Keywords: Easter eggs, Cool Whip eggs, egg dyeing, marbled Easter eggs, no-cook egg dyeing, holiday eggs, festive eggs

