Cannoli Cheesecake Bars Recipe
Introduction
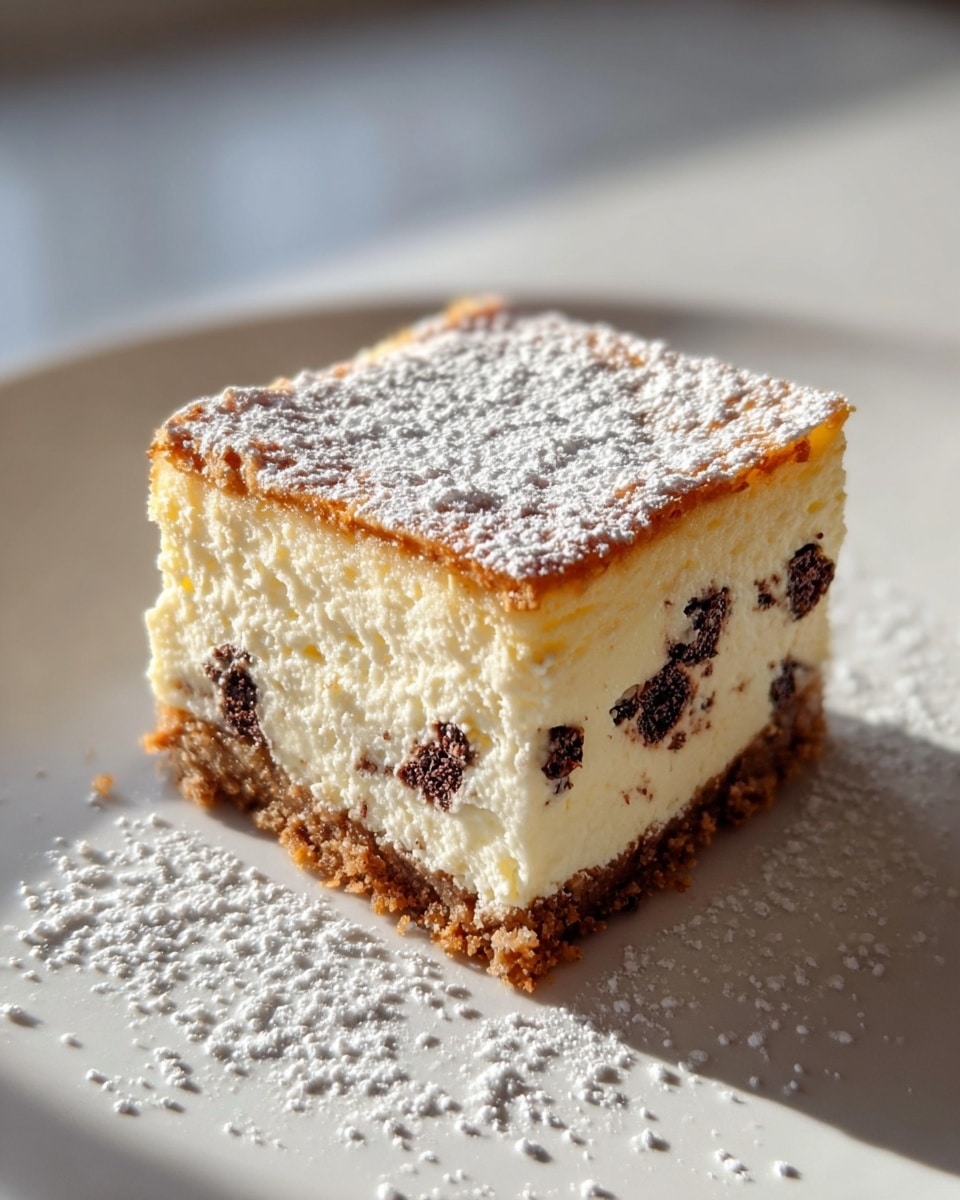
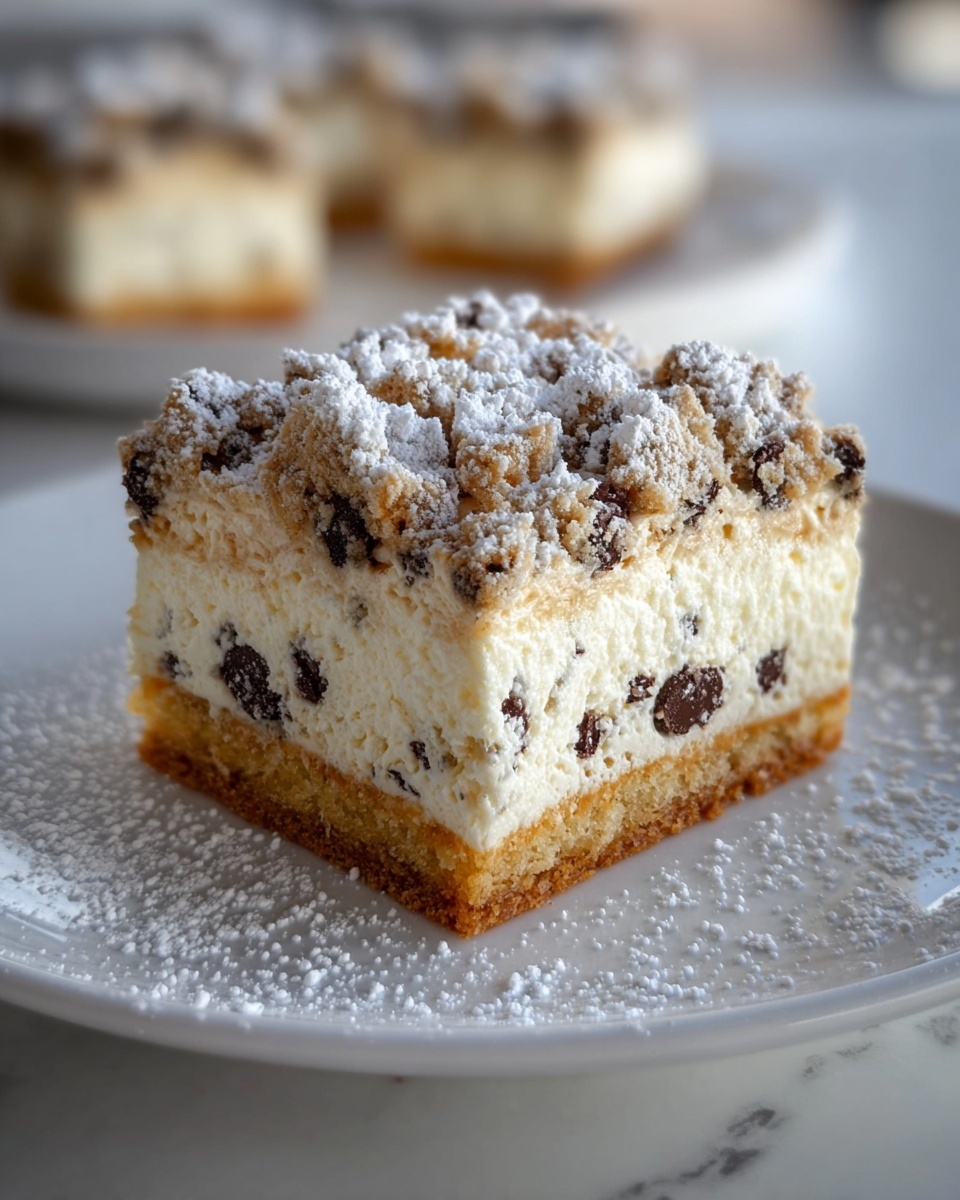
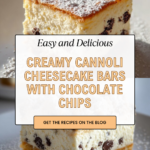
Cannoli Cheesecake Bars combine the creamy richness of traditional Italian ricotta and mascarpone with the delightful crunch of waffle cone crumbs. These bars offer a perfect balance of sweet, tangy, and chocolatey flavors, making them an irresistible treat for any occasion.
Ingredients
- 1 1/2 cups waffle cone crumbs (about 10-12 cones) or graham cracker crumbs
- 5 tablespoons butter, melted
- 8 ounces ricotta cheese, room temperature (full fat preferably, strained overnight if needed)
- 8 ounces mascarpone cheese, room temperature (full fat preferably, strained overnight if needed)
- 1/2 cup granulated sugar
- 2 large eggs
- 1 teaspoon vanilla extract
- 1/2 teaspoon fresh orange zest
- 1/4 teaspoon ground cinnamon
- 3/4 cup mini chocolate chips
- Optional: powdered sugar for dusting
Instructions
- Step 1: Preheat your oven to 350 degrees F. Line the bottom and two sides of a 9×9-inch square baking pan with parchment paper if desired for easy removal.
- Step 2: In a medium bowl, combine the waffle cone crumbs and melted butter. Press this mixture firmly into the bottom of the prepared pan to form an even, thin crust.
- Step 3: In a large mixing bowl, beat together the ricotta, mascarpone, and granulated sugar using an electric mixer on medium speed until smooth and well combined.
- Step 4: Add the eggs one at a time, beating well after each addition. Then mix in the vanilla extract, fresh orange zest, and ground cinnamon until fully incorporated.
- Step 5: Pour the cheesecake filling over the crust in the pan and spread it evenly. Sprinkle the mini chocolate chips evenly on top of the filling.
- Step 6: Bake the cheesecake bars in the preheated oven for about 30 to 45 minutes, or until the edges are slightly golden brown and the center is nearly set. Timing may vary depending on your oven and pan.
- Step 7: Remove from oven and allow to cool completely. Refrigerate for 4 to 6 hours or overnight to set. For easier slicing, you may also freeze the bars before cutting.
- Step 8: Slice into 8 large bars or desired size. Dust with powdered sugar if you like before serving. Store leftovers in the refrigerator or freezer.
Tips & Variations
- For a more authentic texture, strain ricotta and mascarpone overnight to remove excess moisture.
- Swap waffle cone crumbs with graham cracker crumbs if preferred or unavailable.
- Add chopped pistachios or candied orange peel to the filling for extra flavor and crunch.
- Use dark chocolate chips instead of mini chocolate chips for a richer taste.
Storage
Store the cheesecake bars in an airtight container in the refrigerator for up to 4 days. For longer storage, freeze the bars in a sealed container for up to 1 month. When ready to serve, thaw in the refrigerator overnight. Reheat is not recommended as these bars are best served chilled or at room temperature.
How to Serve
Serve this delicious recipe with your favorite sides.
FAQs
Can I use regular cream cheese instead of ricotta and mascarpone?
You can use cream cheese, but the texture and flavor will be different. The ricotta and mascarpone blend offers a lighter, creamier, and more authentic cannoli-inspired cheesecake experience.
How do I know when the cheesecake bars are done baking?
The edges should be slightly golden brown, and the center should be mostly set but may have a slight jiggle. The bars will firm up as they chill, so avoid overbaking to keep them creamy.
PrintCannoli Cheesecake Bars Recipe
These Cannoli Cheesecake Bars combine the creamy richness of traditional cannoli filling with a crisp waffle cone crumb crust, creating a delightful dessert that’s easy to make and perfect for any occasion. With a smooth blend of ricotta and mascarpone cheeses, hints of orange zest and cinnamon, and mini chocolate chips throughout, these bars offer all the classic cannoli flavors in a convenient, sliceable form.
- Prep Time: 15 minutes
- Cook Time: 35 minutes
- Total Time: 5 hours (including chilling time)
- Yield: 8 large bars 1x
- Category: Dessert
- Method: Baking
- Cuisine: Italian-American
Ingredients
Crust
- 1 1/2 cups waffle cone crumbs (about 10–12 cones) or graham cracker crumbs
- 5 tablespoons butter, melted
Cheesecake Filling
- 8 ounces ricotta cheese, room temperature (full fat, preferably strained overnight if needed)
- 8 ounces mascarpone cheese, room temperature (full fat, preferably strained overnight if needed)
- 1/2 cup granulated sugar
- 2 large eggs
- 1 teaspoon vanilla extract
- 1/2 teaspoon fresh orange zest
- 1/4 teaspoon ground cinnamon
- 3/4 cup mini chocolate chips
Optional
- Powdered sugar, for garnish
Instructions
- Preheat Oven and Prepare Pan: Preheat your oven to 350 degrees F. Line the bottom and two sides of a 9×9-inch square baking pan with parchment paper for easier removal, if desired.
- Make the Crust: In a medium mixing bowl, combine the waffle cone crumbs with the melted butter. Press this mixture firmly and evenly into the bottom of the prepared baking pan to form a thin crust layer.
- Prepare Cheesecake Filling: In a large mixing bowl, use an electric mixer on medium speed to beat together the ricotta, mascarpone, and granulated sugar until smooth and well combined. Beat in the eggs one at a time until fully incorporated, then mix in the vanilla extract, orange zest, and ground cinnamon.
- Assemble and Add Chocolate Chips: Pour the cheesecake filling over the prepared crust and spread into an even layer. Sprinkle the mini chocolate chips evenly over the top of the filling.
- Bake: Bake in the preheated oven for 30 to 45 minutes, or until the edges are slightly golden brown and the center is nearly set but still slightly jiggly. Baking time may vary slightly depending on pan size and oven, with most baking times between 30 and 35 minutes.
- Cool and Chill: Remove the pan from the oven and allow it to cool to room temperature. Then refrigerate the cheesecake for at least 4 to 6 hours or overnight to set. For easier slicing, you can also freeze the bars.
- Serve and Store: Slice into 8 large bars or your preferred size and shape. Dust with powdered sugar if desired before serving. Store the cheesecake bars in the refrigerator or freezer to maintain freshness.
Notes
- For best texture, strain ricotta and mascarpone cheeses overnight to remove excess moisture.
- If you can’t find waffle cones, graham cracker crumbs are a good substitute for the crust.
- Allow the bars to chill thoroughly before slicing to ensure clean cuts and proper texture.
- Freeze bars if you prefer firmer slices or for longer storage.
- Orange zest can be adjusted to taste or replaced with lemon zest for a different citrus twist.
Keywords: Cannoli Cheesecake Bars, cannoli dessert, cheesecake bars, ricotta cheesecake, mascarpone dessert, chocolate chip cheesecake, easy cheesecake recipe
