Baked Chicken Wings Recipe
Introduction
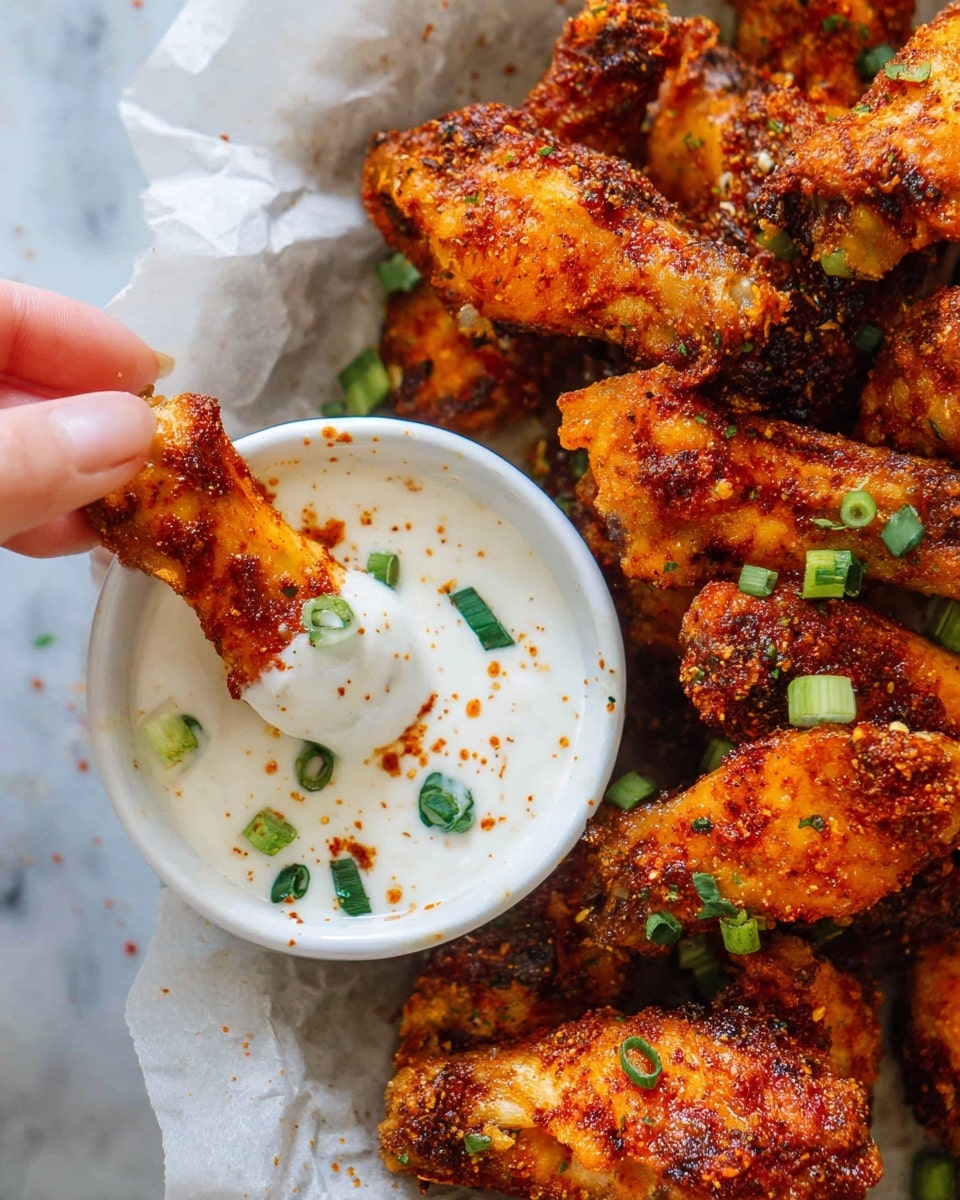
Baked chicken wings are a delicious and easy appetizer or snack that’s crispy without the need for frying. This simple recipe uses a flavorful spice coating and butter to create wings that are golden and full of taste.
Ingredients
- 3 tablespoons unsalted butter (⅜ stick)
- ⅓ cup all-purpose flour
- 2 tablespoons ground paprika
- 1 teaspoon garlic powder
- 1 teaspoon kosher salt
- 1 teaspoon ground black pepper
- 10-12 chicken wingettes (tips removed; thawed if frozen)
Instructions
- Step 1: Preheat your oven to 425°F and line a baking sheet with foil. Dot the foil with small pieces of the unsalted butter; melting it first is optional.
- Step 2: In a medium bowl, mix the flour, paprika, garlic powder, kosher salt, and ground black pepper until well combined.
- Step 3: Coat both sides of each chicken wingette thoroughly with the flour and spice mixture, then arrange them evenly on the butter-dotted foil-lined baking sheet.
- Step 4: Bake the wings for 30 minutes in the preheated oven.
- Step 5: Flip the wings over and bake for an additional 15 minutes, or until they are crispy and cooked through.
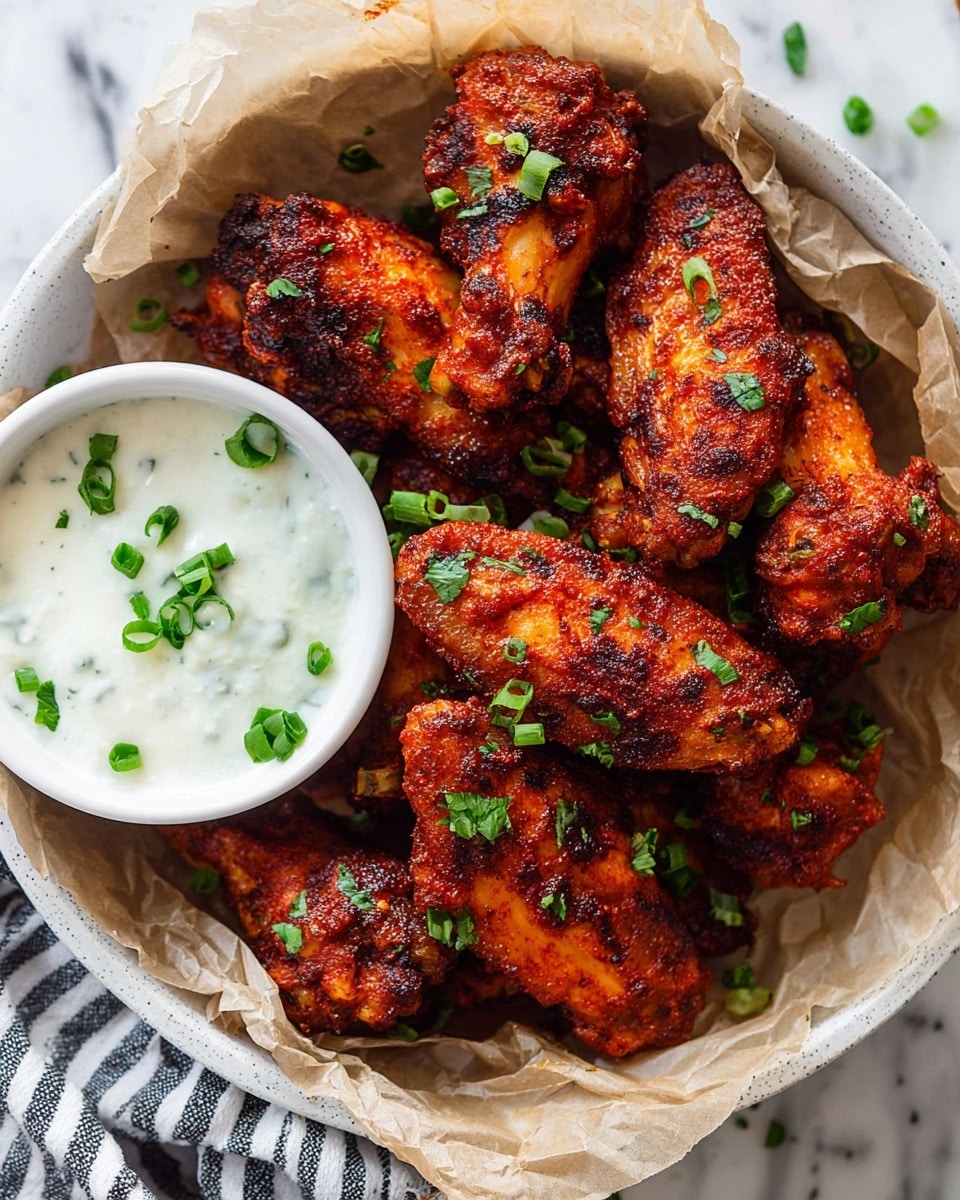
- Step 6: Serve the wings hot with your favorite dipping sauce and an optional sprinkle of fresh parsley for a touch of color and freshness.
Tips & Variations
- For extra crispiness, pat the wings dry with paper towels before coating them.
- Try adding cayenne pepper or chili powder to the flour mixture if you want a spicy kick.
- Butter can be substituted with olive oil for a lighter option.
- Serve with ranch or blue cheese dressing as classic dipping sauces.
Storage
Store leftover wings in an airtight container in the refrigerator for up to 3 days. Reheat in the oven at 375°F for 10-15 minutes to maintain crispiness, or warm briefly in the microwave if convenient.
How to Serve
Serve this delicious recipe with your favorite sides.
FAQs
Can I use frozen wings directly?
It’s best to fully thaw frozen wings before coating and baking to ensure even cooking and a crispy texture.
Can I make these wings ahead of time?
You can prepare the wings coated in the flour mixture and store them in the fridge for a few hours before baking, but baking is best done just before serving for optimal crispness.
PrintBaked Chicken Wings Recipe

Crispy and flavorful baked chicken wings coated with a seasoned flour mixture and baked to golden perfection. This easy recipe uses simple pantry ingredients like paprika, garlic powder, and butter to create a delicious snack or appetizer that’s perfect for any occasion.
- Prep Time: 10 minutes
- Cook Time: 45 minutes
- Total Time: 55 minutes
- Yield: 10–12 wingettes (serves approximately 3–4 people) 1x
- Category: Appetizer
- Method: Baking
- Cuisine: American
Ingredients
Wings and Coating
- 10–12 chicken wingettes (tips removed; thawed if frozen)
- ⅓ cup all-purpose flour
- 2 tablespoons ground paprika
- 1 teaspoon garlic powder
- 1 teaspoon kosher salt
- 1 teaspoon ground black pepper
Butter
- 3 tablespoons unsalted butter (⅜ stick)
Instructions
- Preheat the oven: Preheat your oven to 425°F (220°C). Line a baking sheet with foil for easy cleanup and dot the foil with small pieces of unsalted butter. You don’t need to melt the butter beforehand, just place the butter pieces evenly spaced around the pan.
- Prepare the coating: In a medium-sized bowl, combine the all-purpose flour, ground paprika, garlic powder, kosher salt, and ground black pepper. Mix thoroughly to create a well-seasoned flour mixture.
- Coat the wings: Take each chicken wingette and coat both sides fully with the flour mixture, ensuring an even and thorough covering. This will help create a crispy, flavorful crust after baking.
- Arrange wings on the baking sheet: Place the coated wings on the prepared baking sheet, making sure they are spaced out and that the butter pieces are evenly distributed among the wings for flavor and moisture during baking.
- Bake first side: Bake the wings in the preheated oven for 30 minutes. This initial baking step helps start the cooking process and crisps up the coating.
- Flip and bake other side: After 30 minutes, flip the wings over to ensure even cooking and crispiness. Continue baking for an additional 15 minutes or until the wings are cooked through and golden brown.
- Serve: Once done, remove the wings from the oven and serve immediately. Optionally, sprinkle with fresh parsley and pair with your favorite dipping sauce for extra flavor.
Notes
- Make sure wings are thawed if using frozen for even cooking.
- Butter can be melted before dotting if preferred, but it is not necessary.
- Use a meat thermometer to check that wings reach an internal temperature of 165°F (74°C) for food safety.
- For extra crispiness, you can broil wings for a minute or two at the end of baking, watching carefully to avoid burning.
- This recipe pairs well with ranch or blue cheese dipping sauce.
Keywords: baked chicken wings, crispy chicken wings, easy appetizer, oven-baked wings, party snacks, paprika chicken wings

